Introduction
ဒီတခါ ကျွန်တော်ပြောပြမယ့် အကြောင်းအရာကတော့ "AOSP (Android Open Source Project) SourceCode ကနေ ကိုယ့်ရဲ့ Android Device အတွက် Pure Android OS တခု ဘယ်လို Build မလဲ?" ဆိုတဲ့ အကြောင်းအရာပါ။ အခုနည်းကို သိသွားပြီဆိုရင် တခြားသော AOSP based ROM တွေရော၊ LineageOS based ROM တွေရော၊ Build တတ်သွားပါလိမ့်မယ်။
Build တဲ့နေရာမှာ Android SourceCode ယူရတဲ့ နေရာပဲ ကွဲသွားတာပါ။ တခုတော့ သတိပေးထားပါရစေ။ Android ရဲ့ SourceCode တွေရဲ့ Filesize က 20GB နဲ့ အထက်မှာ ရှိပါတယ်။ အဲဒါကြောင့် Internet ကောင်းမှပဲ အဆင်ပြေပါလိမ့်မယ်။
Build တဲ့ နေရာမှာ Linux မှာရော၊ Mac မှာရော Build လို့ရပါတယ်။ ကျွန်တော်က Linux သမားဆိုတော့ (ခုလောလောဆယ်တော့ ubuntu 17.04 ပဲ သုံးဖြစ်ပါတယ်) Ubuntu ပေါ်မှာ Build တာပဲ ဥပမာပေး ပြောသွားမှာပါ။ Build မယ့် Target Android Device ကတော့ Nexus 5X ပဲ ဖြစ်ပါတယ်။
Requirements
- Linux OS သုံးထားတဲ့ Computer တလုံး ရှိရပါမယ်
- OpenJDK Install လုပ်ထားရပါမယ်
- Python 2.7+ Install ထားရပါမယ် (Google ရဲ့ git-repo က Python နဲ့ရေးထားတာ ဖြစ်တဲ့အတွက် Python Install လုပ်မထားရင် git-repo က အလုပ်မလုပ်ပါဘူး)
- Git အသုံးပြုတတ်ရပါမယ်
- Google ရဲ့ git-repo လည်း သုံးတတ်ရပါမယ်။ git-repo အကြောင်းကို ဒီမှာ ဝင်ကြည့်နိုင်ပါတယ်။ ပြီးသွားရင် git-repo command တွေကိုတော့ ဒီမှာ လေ့လာကြည့်ပါ။
git-repo
git-repo ဆိုတာ Git ပေါ်မှာ အခြေခံပြီး Google က Develop ထားတဲ့ Tool တခုပါ။ Android ROM Development မှာ အရမ်းအသုံးဝင်ပါတယ်။ [ git-repo - Multiple Repository Tool ] လို့ခေါ်ပါတယ်။
သူ့ရဲ့ အသုံးဝင်ပုံကတော့ Repo တခုဆောက်ပြီးတာနဲ့ အဲဒီထဲမှာ .xml File လေးတခုဆောက်၊ ကိုယ် Remote လုပ်ချင်တဲ့ Repo တွေကိုအများကြီးကို Link ပေး၊ repo sync ဆိုတဲ့ Command ကိုသုံးပြီး ကိုယ့်ရဲ့ Local Machine ထဲကို တနေရာတည်းမှာပဲ Repository တွေအများကြီး Download ဆွဲလို့ရပါတယ်။
သဘောက ROM တခု Build ဖို့ လိုအပ်တဲ့ Android SourceCode Repository တွေက အများကြီးထဲကမှ တခုချင်းလိုက် git clone မနေပဲ .xml File လေးကနေ Repository တွေအများကြီးစုပြီး Local ထဲကို Download ဆွဲလိုက်တဲ့ သဘောပါပဲ။
Step 1: OpenJDK Installation
အရင်ဆုံး OpenJDK ကို ကိုယ့်ရဲ့ Computer ထဲမှာ Install လုပ်ထားဖို့ လိုပါတယ်။ Terminal ကိုဖွင့်ပြီး အောက်ပါ Command လေးတွေ ရိုက်ပေးပါ။
sudo apt-get update
sudo apt-get install openjdk-8-jdk
sudo apt-get install openjdk-8-jreOpenJDK ကို Install လုပ်တဲ့ နေရာမှာ "ကိုယ် Build မယ့် Android Version ပေါ် မူတည်ပြီး Install လုပ်ရမယ့် OpenJDK Version တွေ ကွဲသွားမယ်" ဆိုတာကို သတိပြုဖို့ လိုပါမယ်။
- Android Nougat ကနေ Android Oreo ဆိုရင် OpenJDK 8 ကို Install လုပ်ပေးပါ။
- Android Lollipop ကနေ Android Marshmallow ဆိုရင် OpenJDK 7 ကို Install လုပ်ပေးပါ။
- Android Gingerbread ကနေ Android KitKat ဆိုရင် OpenJDK 6 ကို Install လုပ်ပေးပါ။
- Android Gingerbread အောက်က Android Version အတွက်ကတော့ ဘယ်သူမှလည်း Build မှာ မဟုတ်တဲ့အတွက် မပြောတော့ပါဘူး။
Step 2: Python Installation
နောက်တဆင့် အနေနဲ့ Python ကို Install လုပ်ပေးရမှာပါ။ Python 2.7 လောက်ဆို အဆင်ပြေပါပြီ။
Python 3 နဲ့အထက်ဆိုရင်တော့ git-repo အတွက် သိပ်အဆင်မပြေပါဘူး။ အဲဒါကြောင့် Python 2.7 ကိုပဲ Install လုပ်ပေးပါ။
sudo add-apt-repository ppa:fkrull/deadsnakes
sudo apt-get update
sudo apt-get install python2.7
Step 3: Build-Tools Installation
လိုအပ်တဲ့ Build-Tools တွေကို Install လုပ်ဖို့အတွက် အောက်က Command လေးကို Terminal မှာ ရိုက်ပေးပါ။
sudo apt-get install git-core gnupg flex bison gperf build-essential zip curl zlib1g-dev gcc-multilib g++-multilib libc6-dev-i386 lib32ncurses5-dev x11proto-core-dev libx11-dev lib32z-dev ccache libgl1-mesa-dev libxml2-utils xsltproc unzip
Step 4: Git and Repo (git-repo) Installation
အရင်ဆုံး Git ကို Install မလုပ်ရသေးဘူးဆိုရင် လုပ်ပေးပါ။ (Install လုပ်ထားပြီးသားဆိုရင်တော့ ဒီအဆင့်ကို ကျော်သွားလို့ ရပါတယ်)
sudo apt-get install git-core
Git အတွက် Username နဲ့ Email Address ဖြည့်ပေးပါ။
git config --global user.name "Your Name"
git config --global user.email "you@example.com"Google ရဲ့ git-repo ကို Install လုပ်ပေးရပါမယ်။
mkdir ~/bin
PATH=~/bin:$PATH
curl https://storage.googleapis.com/git-repo-downloads/repo > ~/bin/repo
chmod a+x ~/bin/repo- အဲဒါတွေ အကုန်ပြီးသွားပြီ ဆိုရင်တော့ ROM တခု Build ဖို့အတွက် Setup Environment ပိုင်းက ပြည့်စုံသွားပါပြီ။
Downloading the Sources
- Sources တွေ Download လုပ်တဲ့ နေရာမှာ CustomROM တခု Build ဖို့အတွက် မရှိမဖြစ် လိုအပ်တာတွေကို အရင်ဆုံး ပြောချင်ပါတယ်။
- Android OS ကြီးတခုလုံးအတွက် လိုအပ်မယ့် Framework တွေ၊ Library တွေ၊ System Apps Package တွေ၊ Device Tree တွေ၊ Kernel Tree တွေ၊ Build-Tools တွေ၊ toochains GCC Compiler တွေ၊ စတဲ့ Repository တွေပါတဲ့ Android Plaform Manifest ရဲ့ Filesize က 20GB နဲ့ အထက်မှာရှိပါတယ်။
- Google ရဲ့ Device တွေဖြစ်တဲ့ Nexus နဲ့ Pixel အတွက်မဟုတ်ပဲ တခြား Android Device တွေအတွက်ဆိုရင်တော့ Device Tree နဲ့ Kernel Source တွေ ရှာထားဖို့ လိုပါတယ်။ Google ရဲ့ Devices တွေအတွက် Device Tree တွေက AOSP Repo ထဲမှာ တခါတည်းပါပြီးသားပါ။ (ခုမှ စလုပ်တဲ့သူအနေနဲ့ အကြီးဆုံး ROM Community ကြီး ဖြစ်တဲ့ LineageOS အောက်မှာ သွားရှာတာ အကောင်းဆုံးပါပဲ။ ကိုယ့်ဖုန်းရဲ့ Hardware Arch ပေါ်မူတည်ပြီး Device Tree ထုတ်နည်းကိုတော့ နောက်မှ သက်သက်ရေးပေးပါမယ်။
- ပြီးရင် Android device တွေ အတွက် Proprietary Vendor File တွေပါ လိုအပ်ပါတယ်။ တနည်းအားဖြင် အဲဒီ File တွေက Non-opensource File တွေပါ။ ကိုယ့်ဖုန်းရဲ့ Firmware ထဲကနေ ပြန်ထုတ်ရတာပါ။ ဥပမာအနေနဲ့ ဒီ Repo ထဲမှာ ဝင်ကြည့်ပါ။
ပထမဆုံး လုပ်ရမှာက Sources တွေ Download လုပ်ဖို့အတွက် Directory တခု ဆောက်ပါမယ်။
mkdir AOSP-ROM-Project
cd AOSP-ROM-Project
- Android SourceCode တွေ Download လုပ်ပါတော့မယ်။ Google Git က AOSP Repo ကနေ Download လုပ်မယ်ဆိုရင် Filesize အရမ်းများတာမို့လို့ ကျနော် GitHub မှာ ဆောက်ထားတဲ့ Personal AOSP Repo ကနေ Down ရင် ပိုသက်သာလိမ့်မယ်လို့ အကြံပြုချင်ပါတယ်။ ဘာလို့လဲဆိုတော့ ကျနော့် GitHub AOSP Repo ထဲမှာ မလိုအပ်တဲ့ Project Path တွေ လျော့ထားတာကြောင့်ပါ။ သဘောပါပဲ။ နှစ်သက်တဲ့ Repo ကနေ Download ဆွဲပါ။
- ပထမဦးဆုံး AOSP SourceCode တွေ ရှိတဲ့နေရာကို သိရပါမယ်။ ဒီမှာ သွားကြည့်ပါ။
- -b နောက်ကကောင်က ကိုယ် Build မယ့် Branch ပါ။ တနည်းအားဖြင့် ကိုယ် Build ချင်တဲ့ Android version ပါ r (r_23) ဆိုတာ Release ကို ဆိုလိုတာပါ။
ဒီနေရာမှာ သုံးတဲ့ Command တွေက git-repo command တွေပါ။ သုံးမယ့် Repository ကလည်း git-repo အတွက် ရည်ရွယ်ပြီး ရေးထားတဲ့ Repository တခု ဖြစ်ပါတယ်။ xml နဲ့ရေးပါတယ်။ ရေးနည်းကလည်း ရိုးရှင်းပါတယ်။ ဒီမှာ လေ့လာကြည့်ပါ။
repo init -u https://android.googlesource.com/platform/manifest -b android-8.0.0_r23
(OR)
repo init -u https://github.com/zawzaww/aosp-android -b oreo
- တခြား CustomROM တခုခုရဲ့ SourceCode ကိုပါ Download လုပ်နိုင်ဖို့အတွက် ထပ်ဖြည့်ပြောပါမယ်။ (လူသိများတဲ့ LineageOS နဲ့ပဲ ဥပမာပေးသွားပါမယ်)
-b နောက်ကကောင်က Branch Name ပါ။ lineage-15.0 က Oreo Build အတွက်ပါ။ cm-14.1/cm-14.0 သုံးရင် Nougat build အတွက်ပါ။ ကြိုက်တဲ့ Android version ကို Build နိုင်ပါတယ်။
repo init -u git://github.com/LineageOS/android.git -b lineage-15.0
Sources တွေ Download လုပ်ဖို့အတွက် အောက်က Command လေး ရိုက်ပေးပါ။
repo sync
- အဲဒီနောက်မှာတော့ Sources တွေ Downloading လုပ်နေတဲ့ အပိုင်းပါ။ SourceCode တွေ Download လုပ်တဲ့ Process ကတော့ ကိုယ့်ရဲ့ Internet Connection ပေါ်မှာ မူတည်ပါလိမ့်မယ်။
Building AOSP from Sources
- အရင်ဆုံး Source ကနေ Compilation မလုပ်ခင် ကြိုတင်ပြင်ဆင်ထားရမယ့် အရာတွေကို ပြောပြပေးပါမယ်။
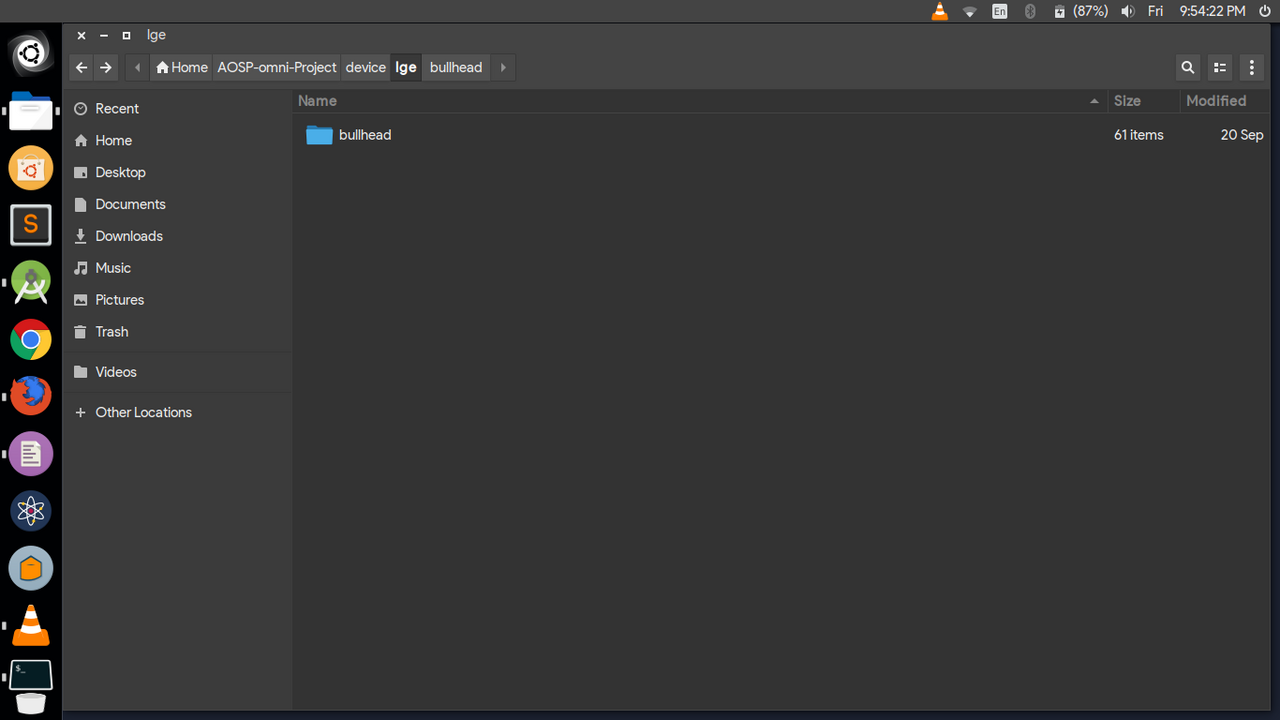
- ပထမဆုံး လိုအပ်တာက ကိုယ့်ဖုန်းရဲ့ Device Tree ပါ။
- Location က ဘယ်မှာ သွားထည့်ရမလဲဆိုရင် Download ထားတဲ့ Source dir အောက်က /device အောက်မှာ သွားထည့်ပေးရမှာပါ။
Format:
/device/manufacturer/device_name
Example for Nexus 5X:
/device/lge/bullhead
- ROM build တဲ့နေရာမှာ Kernel ပိုင်းက Kernel Source ကနေ Build တာရယ်၊ အဆင်သင့် Build ထားပြီးသား Prebuilt Kernel ကနေ ROM ထဲထည့်ပြီး Build တာဆိုပြီး နှစ်မျိုးရှိပါတယ်။ ကျနော်ကတော့ Kernel Source ကနေ Build တာပဲ အကြံပေးပါတယ်။
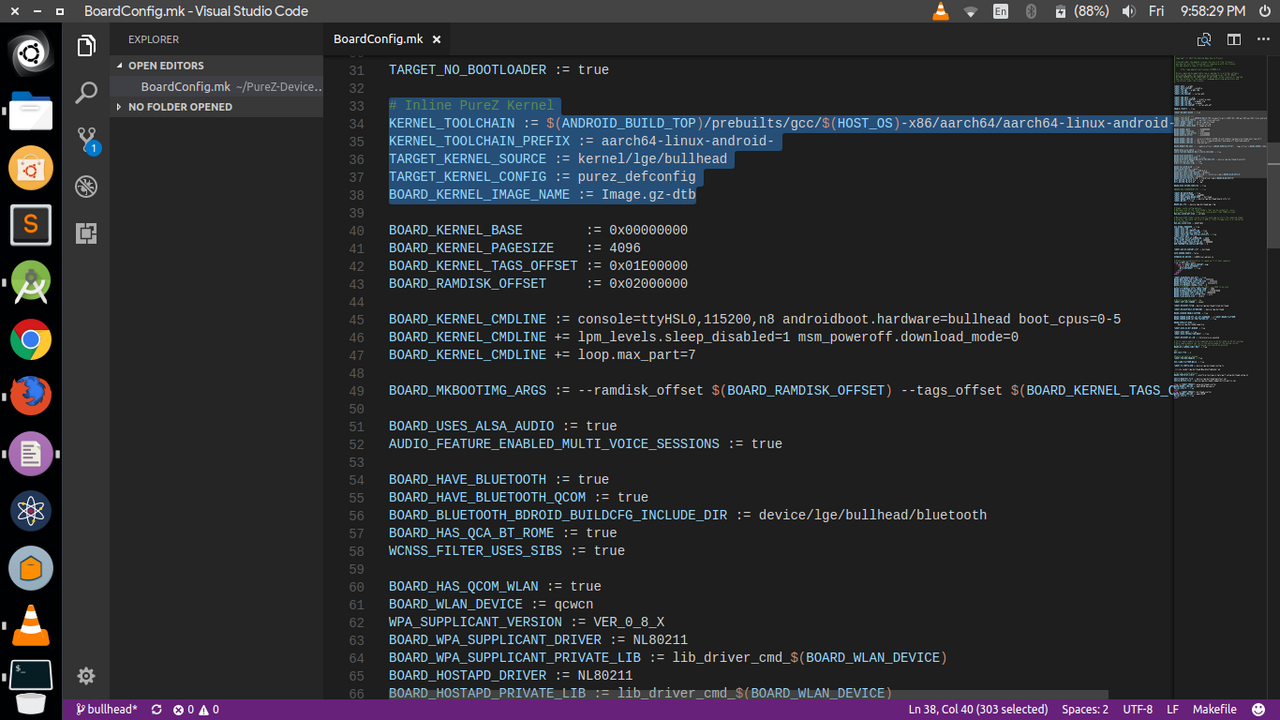
နောက်ပြီး Kernel Source ကနေ Build မယ်ဆိုရင် Device Tree ထဲမှာ ပြင်ဆင်စရာရှိပါတယ်။ Nexus 5X အနေနဲ့ ပြောပါမယ်။ /device/lge/bullhead/BoardConfig.mk ကို TextEditor တခုနဲ့ ဖွင့်ပြီး အောက်က Code လေးတွေ ထပ်ဖြည့်လိုက်ပါ။
# Inline PureZ Kernel Build
KERNEL_TOOLCHAIN := $(ANDROID_BUILD_TOP)/prebuilts/gcc/$(HOST_OS)-x86/aarch64/aarch64-linux-android-4.9/bin
KERNEL_TOOLCHAIN_PREFIX := aarch64-linux-android-
TARGET_KERNEL_SOURCE := kernel/lge/bullhead
TARGET_KERNEL_CONFIG := purez_defconfig
BOARD_KERNEL_IMAGE_NAME := Image.gz-dtbExplanation:
ဒီအဆင့်က ကျွန်တော် ပထမဆုံး ရေးထားခဲ့တဲ့ Tutorial ကို ဖတ်ပြီးမှ အဆင်ပြေပါလိမ့်မယ်။
Line 1 - Kernel ကို Compile မယ့် Toolchain location ကို ပေးတာပါ။
Line 2 - ကိုယ်သုံးမယ့် Toolchain ရဲ့ Kernel Toolchain Prefix လို့ခေါ်ပါတယ်။ (သိပ်နားမလည်ဘူးဆိုရင် Kernel Compilation Tutorial မှာ လေ့လာကြည့်ပါ)
Line 3 - ဒါကတော့ ကိုယ် Build မယ့် Kernel Source Location ပါ။
Line 4 - Kernel Build ဖို့အတွက် Kernel Configuration လုပ်ပေးရပါတယ်။ ဒီ Code တွေက Kernel config အပိုင်းပါ။
Line 5 - ကိုယ့်ဖုန်းအတွက် Output ထွက်မယ့် Kernel Image Name ကို အတိအကျ ရေးပေးရပါမယ်။
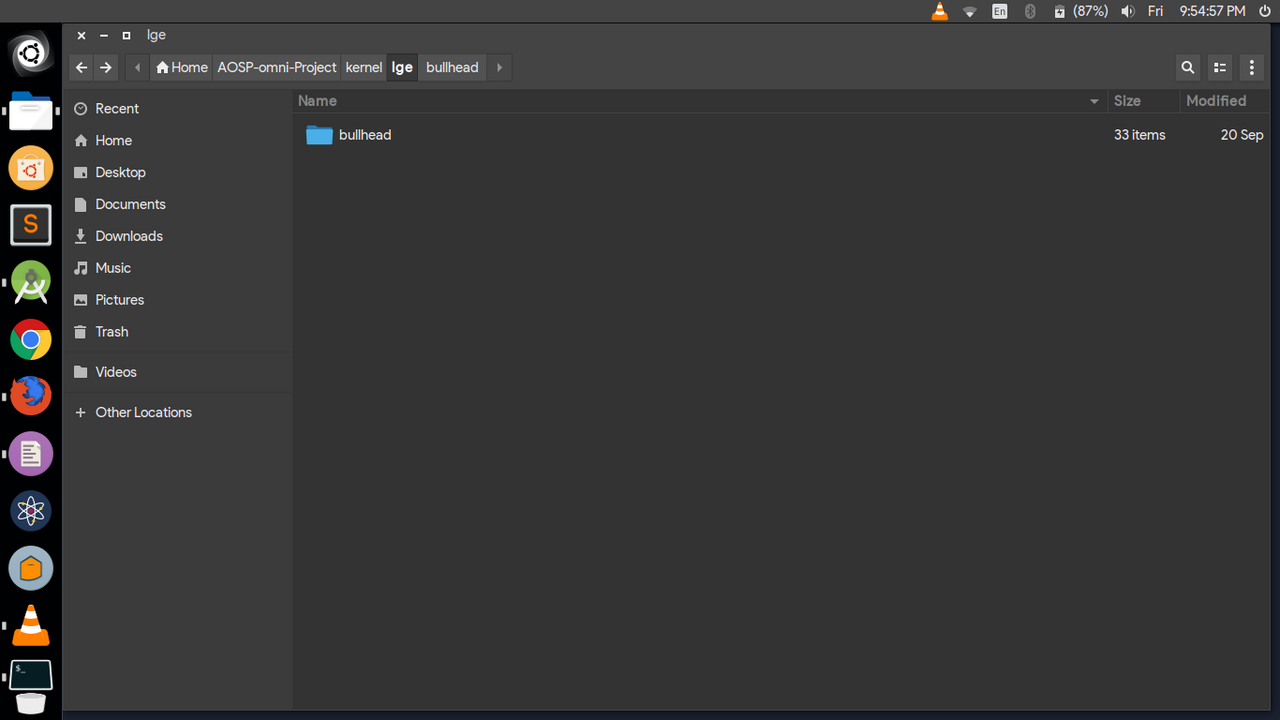
- နောက်တဆင့်က Kernel Source အပိုင်းပါ။ သွားထည့်ပေးရမယ့် Location ကတော့ Source dir အောက်က /kernel အောက်မှာ သွားထည့်ပေးရမှာပါ။
Format:
/kernel/manufacturer/device_name
Example: for Nexus 5X ( ဒီ Location က Device Tree ထဲမှာ Kernel Source Path လမ်းကြောင်း ပြန်ပေးရမှာပါ)
/kernel/lge/bullhead
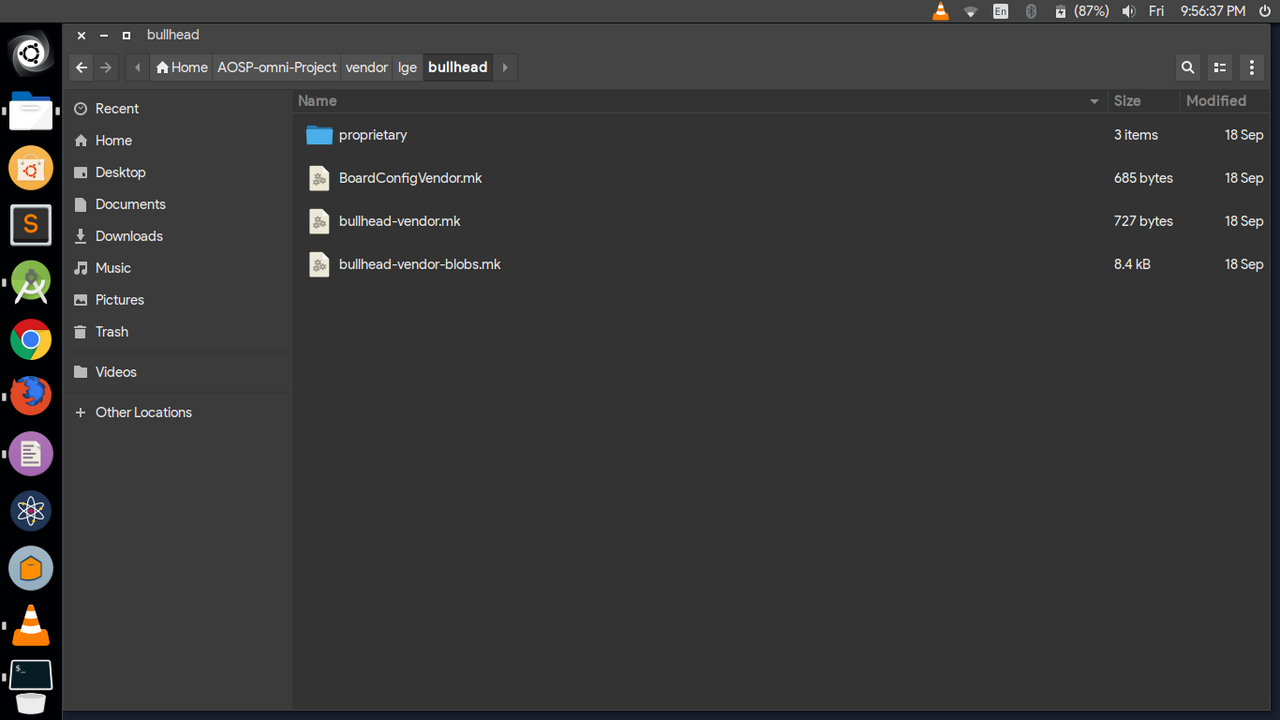
- vendor အပိုင်းပါ။ အဲဒီကောင်က Source dir အောက်က /vendor အောက်မှာ သွားထည့်ပေးရမှာပါ။
Format:
/vendor/manufacturer/device_name
Example: for Nexus 5X
/vendor/lge/bullhead
- ဒါတွေပြည့်စုံသွားရင်တော့ AOSP ROM တခု Build ဖို့ အဆင်သင့် ဖြစ်ပါပြီ။
Final Steps
ဒါကတော့ နောက်ဆုံးအဆင့်ရောက်ပါပြီ။ Download လုပ်ထားတဲ့ Source Dir ထဲ ဝင်လိုက်ပြီး Terminal ကို ဖွင့်လိုက်ပါ။ အောက်က Command လေး ရိုက်ပေးပါ။
. build/envsetup.sh
- ပြီးသွာ;ရင် ကိုယ် Build မယ့် Device ကို Lunch လုပ်ပေးရပါမယ်။
Format:
lunch <device_name>
(OR)
lunch
Example: for Nexus 5X
lunch aosp_bullhead-userdebug
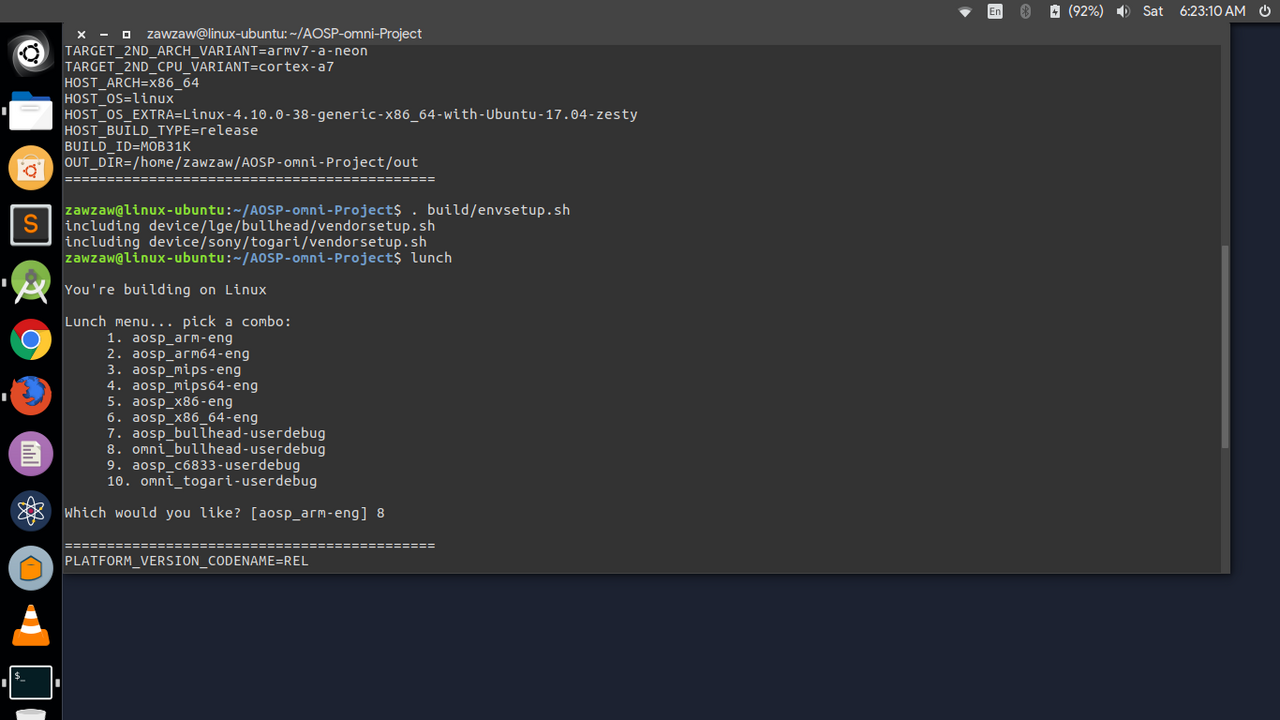
အကောင်းဆုံးကတော့ lunch လို့ ရိုက်လိုက်လို့ ကိုယ် Build မယ့် Device Name တွေ ကျလာပြီဆိုရင် Build ချင်တဲ့ device no. ကို ဆက်ရိုက်ပေးတာ အကောင်းဆုံးပါပဲ။
lunch
Enter 1 or 2 or 3 etc...
ပြီးရင် Build ဖို့အတွက် အောက်က Command လေး ရိုက်ပေးပါ။
make -j4
(OR)
make -j$(nproc --all)
- Output ကတော့ /out/target/product/bullhead/ အောက်မှာ ထွက်သွားပါလိမ့်မယ်။
- ပြီးရင်တော့ Compilation Process စတင်ပါမယ်။ Process Time ကတော့ ကိုယ့် Computer ရဲ့ CPU ပေါ် မူတည်ပါလိမ့်မယ်။
တခြား AOSP Based or LineageOS Based ROM တွေ အတွက် Build တဲ့ Command လေးကို ထပ်ဖြည့်ပြီး ပြောပေးပါမယ်။ အပေါ်မှာ ပြောခဲ့တာတွေက လုံးဝ Pure AOSP Source ကနေ Build တာပါ။ သုံးမယ့် Command တွေကတော့ တခြား ROM Team တွေနဲ့ နည်းနည်းကွဲပြားပါတယ်။
ပထမဆုံး command ကတော့ တူတူပါပဲ။
. build/envsetup.sh
- ပြီးရင် အောက်က command လေး ဆက်ရိုက်ပေးပါ။
Format:
breakfast <device_name>
Example: for Nexus 5X (bullhead)
breakfast bullhead
Build ဖို့အတွက် အောက်က command လေး ဆက်ရိုက်ပေးပါ။
mka bacon
- Output ကတော့ /out/target/product/bullhead/ အောက်မှာ flashablezip အနေနဲ့ ထွက်လာပါလိမ့်မယ်။
- Compilation Process Time ကတော့ အပေါ်မှာ ပြောခဲ့သလိုပဲ Computer ရဲ့ CPU ပေါ်မှာ မူတည်ပါလိမ့်မယ်။


Join Us On