ကျွန်တော် Part (1) မှာ Database ဘယ်လိုဆောက်မလဲ၊ Table တွေ ဘယ်လိုဆောက်မလဲဆိုတာတွေ ရေးခဲ့ပါတယ်။ ရှေ့ဆက်ပြီး ကျွန်တော် Database နဲ့ ပတ်သက်တဲ့ CRUD အပိုင်းတွေ သွားပါမယ်။
Primary Key
Database Table တွေမှာ Primary Key က အရေးကြီးပါတယ်။ Realm မှာ Primary Key သတ်မှတ်မယ်ဆိုရင် သတ်မှတ်လို့ရပါတယ်။ @PrimaryKey ဆိုတဲ့ Annotation နဲ့ သတ်မှတ်ပေးရပါတယ်။ သတ်မှတ်လို့ရတဲ့ Variable Type တွေကတော့ String, byte, short, int, long စတာတွေပဲ ဖြစ်ပါတယ်။ အဲဒီအပြင် သူတို့ရဲ့ boxed variants တွေဖြစ်တဲ့ Byte, Short, Integer, Long စတာတွေလဲ သုံးလို့ရပါတယ်။
Primary Key သတ်မှတ်လိုက်မယ်ဆိုရင် ရလာတဲ့ အကျိုးကျေးဇူးကတော့ String ဆိုရင် index လုပ်ပြီးသား ဖြစ်တာနဲ့ copyToRealmOrUpdate() သုံးလို့ရလာတာပါ။ Primary Key က String ဆိုရင် @Index ဆိုတဲ့ Annotation ကို တစ်ခါတည်း သတ်မှတ်ပြီး ဖြစ်ပါတယ်။ Indexed လုပ်ထားတာ ဖြစ်တဲ့အတွက် Search လုပ်တဲ့အခါ ပိုပြီး မြန်မြန်ဆန်ဆန် လုပ်ဆောင်ဖို့ အထောက်အပံ့ပြုနိုင်ပါတယ်။ ဒါပေမယ့် Indexed လုပ်တဲ့အခါ ထုံးစံအတိုင်း အချက်အလက် ထည့်သွင်းချိန်မှာ တစ်ခု အသစ်ထည့်လိုက်တိုင်း indexed ပြန်ပြန်လုပ်နေတဲ့အတွက် ပုံမှန်ထက် အချိန်ပိုယူပါတယ်။ အဲဒီအတွက် Data Creation လုပ်တဲ့အခါ Performance ကို အနည်းငယ် ထိခိုက်စေပါတယ်။ ဒါပေမယ့် Query လုပ်တဲ့အခါမှာတော့ အချိန်ပိုမြန်လာပါတယ်။
Primary Key သတ်မှတ်တဲ့နေရာမှာ နောက်တစ်ခု သတိထားဖို့ လိုတဲ့အချက်က String နဲ့ Boxed Integer တွေ ဖြစ်တဲ့ Byte, Short, Integer, Long စတာတွေမှာ @PrimaryKey Annotation နဲ့အတူ @Required ဆိုတာပါ တစ်ခါတည်း တွဲထည့်ပေးဖို့ လိုအပ်ပါမယ်။ မဟုတ်ရင် null value assigned လုပ်သွားပြီး Error တက်နိုင်ပါတယ်။ နောက်တစ်ခု သတိထားဖို့ လိုတဲ့အချက်တစ်ခုကတော့ Primary Key ကို Field တစ်ခုထက်ပိုပြီး သတ်မှတ်လို့ မရပါဘူး။ Multiple Keys (compound key)တွေမှာ Primary Key သတ်မှတ်လို့ မရပါဘူး။ ကဲ၊ ကျွန်တော်တို့ Project မှာ တစ်ချို့ကို Primary Key နဲ့ သုံးပြီး တစ်ချို့ဟာတွေကို မသုံးပဲ ထားကြည့်ရအောင်။ အဲဒီလို ဘာကြောင့် သုံးတာလဲဆိုရင် အချက်အလက် အထည့်အသွင်းလုပ်တဲ့အခါ ပုံစံမတူညီတဲ့အတွက် ဖြစ်ပါတယ်။
Category အတွက်ကတော့ အရင်အတိုင်းပါပဲ။
| package net.myanmarlinks.awesomerealm.model; | |
| import io.realm.RealmObject; | |
| /** | |
| * Created by soethihanaung on 7/7/17. | |
| */ | |
| public class Category extends RealmObject { | |
| private String id; | |
| private String name; | |
| public Category() { | |
| } | |
| public Category(String id, String name) { | |
| this.id = id; | |
| this.name = name; | |
| } | |
| public String getId() { | |
| return id; | |
| } | |
| public void setId(String id) { | |
| this.id = id; | |
| } | |
| public String getName() { | |
| return name; | |
| } | |
| public void setName(String name) { | |
| this.name = name; | |
| } | |
| } |
Author အတွက်တော့ ကျွန်တော် Primary Key ထည့်လိုက်ပါတယ်။
Post အတွက်လဲ အတူတူပဲ Primary Key ထည့်လိုက်ပါတယ်။
| package net.myanmarlinks.awesomerealm.model; | |
| import io.realm.RealmObject; | |
| import io.realm.annotations.PrimaryKey; | |
| /** | |
| * Created by soethihanaung on 7/7/17. | |
| */ | |
| public class Post extends RealmObject { | |
| @PrimaryKey | |
| private int id; | |
| private String title; | |
| private Category category; | |
| private Author author; | |
| public int getId() { | |
| return id; | |
| } | |
| public void setId(int id) { | |
| this.id = id; | |
| } | |
| public String getTitle() { | |
| return title; | |
| } | |
| public void setTitle(String title) { | |
| this.title = title; | |
| } | |
| public Category getCategory() { | |
| return category; | |
| } | |
| public void setCategory(Category category) { | |
| this.category = category; | |
| } | |
| public Author getAuthor() { | |
| return author; | |
| } | |
| public void setAuthor(Author author) { | |
| this.author = author; | |
| } | |
| } |
ပထမဦးဆုံး Category နဲ့ Author Table တွေကို Data ထည့်ကြည့်ရအောင်
| package net.myanmarlinks.awesomerealm; | |
| import android.os.Bundle; | |
| import android.support.v7.app.AppCompatActivity; | |
| import net.myanmarlinks.awesomerealm.model.Author; | |
| import net.myanmarlinks.awesomerealm.model.Category; | |
| import java.util.ArrayList; | |
| import java.util.List; | |
| import java.util.UUID; | |
| import io.realm.Realm; | |
| public class MainActivity extends AppCompatActivity { | |
| private Realm realm; | |
| @Override | |
| protected void onCreate(Bundle savedInstanceState) { | |
| super.onCreate(savedInstanceState); | |
| setContentView(R.layout.activity_main); | |
| realm = Realm.getDefaultInstance(); | |
| List<Category> categories = new ArrayList<>(); | |
| List<Author> authors = new ArrayList<>(); | |
| categories.add(new Category(getUniqueID(), "News")); | |
| categories.add(new Category(getUniqueID(), "IT")); | |
| categories.add(new Category(getUniqueID(), "Breaking News")); | |
| authors.add(new Author(getUniqueID(), "Aung Aung")); | |
| authors.add(new Author(getUniqueID(), "Baung Baung")); | |
| authors.add(new Author(getUniqueID(), "Hla Hla")); | |
| realm.beginTransaction(); | |
| realm.copyToRealm(categories); | |
| realm.copyToRealmOrUpdate(authors); | |
| realm.commitTransaction(); | |
| } | |
| private String getUniqueID() { | |
| return UUID.randomUUID().toString(); | |
| } | |
| } |
ကျွန်တော်တို့ ရေးထားတဲ့ ကုဒ်ကို နည်းနည်းလေ့လာကြည့်ရအောင်
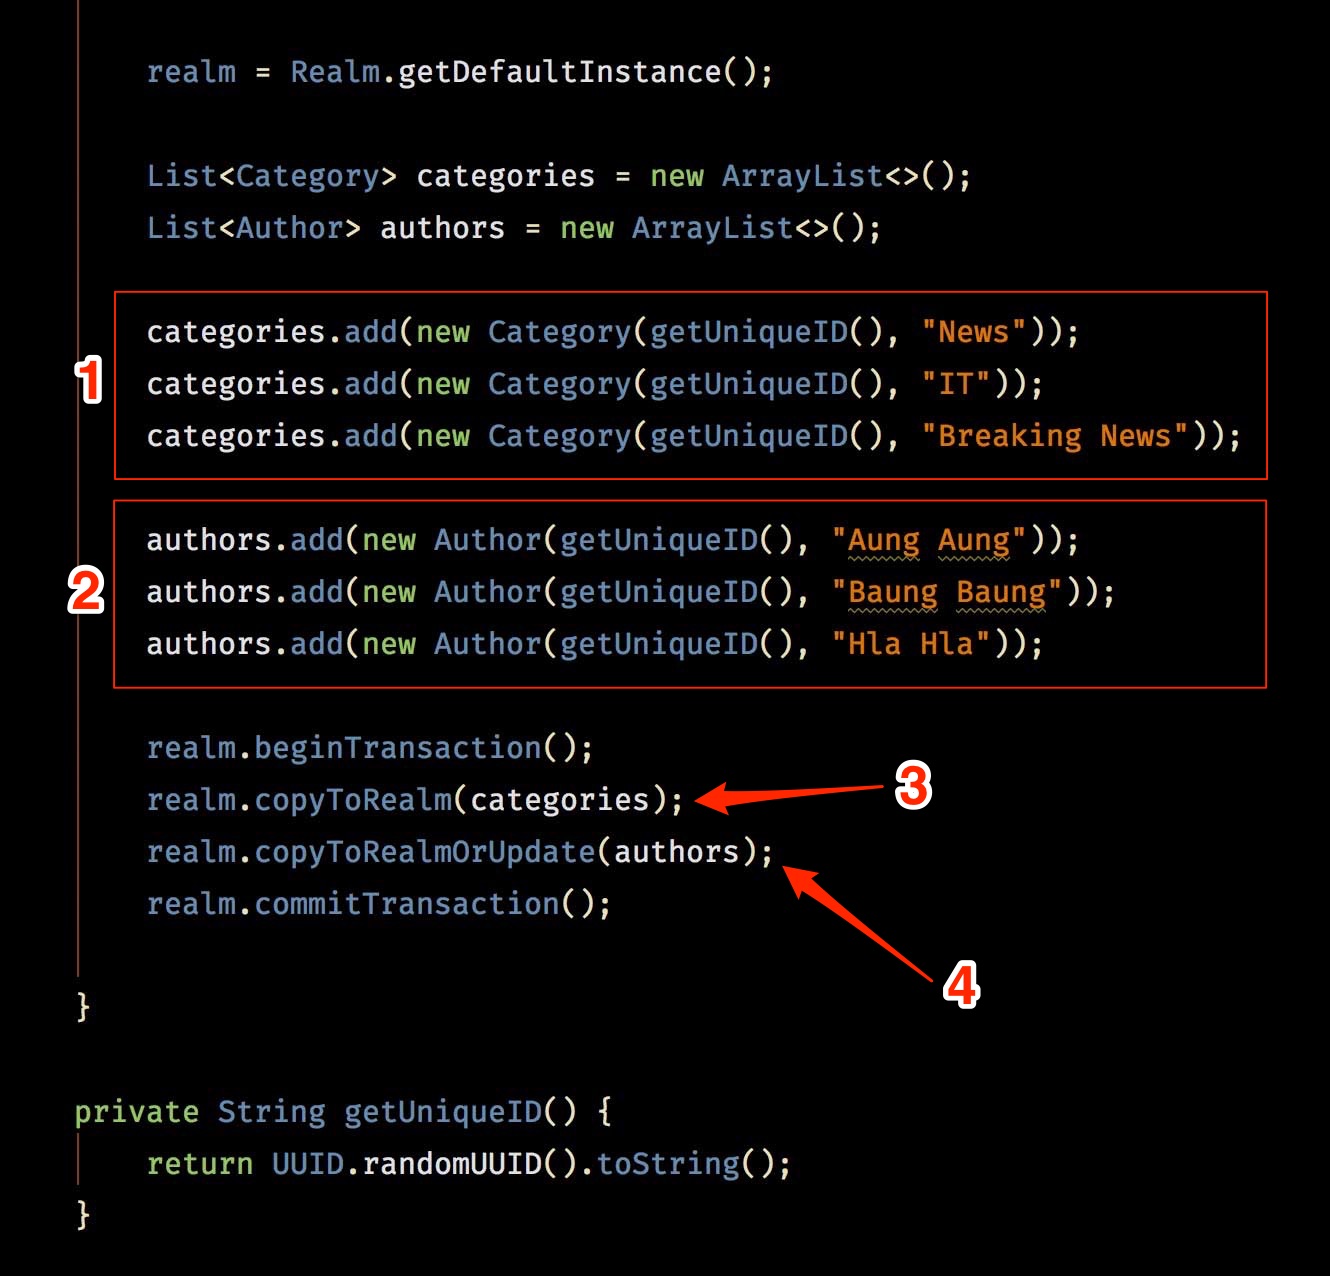
Code Block (1) က Category ArrayList ကို တည်ဆောက်တာပါ။ Code Block (2) က Author ArrayList ကို တည်ဆောက်တာပါ။ Realm ထဲကို ထည့်သွင်းချင်တယ်ဆိုရင် realm.beginTransaction() နဲ့ စပြီး realm.commitTransition() နဲ့ အဆုံးသတ်ပေးရပါတယ်။
realm.copyToRealm(categories) ကတော့ Realm ထဲ ထည့်သွင်းလိုက်တာပါ။ နောက်တစ်ခု authors က Primary Key သတ်မှတ်ထားတဲ့အတွက် realm.copyToRealmOrUpdate(authors) ကို သုံးလို့ရပါတယ်။ copyToRealmOrUpdate() ဟာ Key တူနေရင် Update လုပ်ပြီး Key အသစ်ဆိုရင် ထပ်ပေါင်းထည့်ပါတယ်။
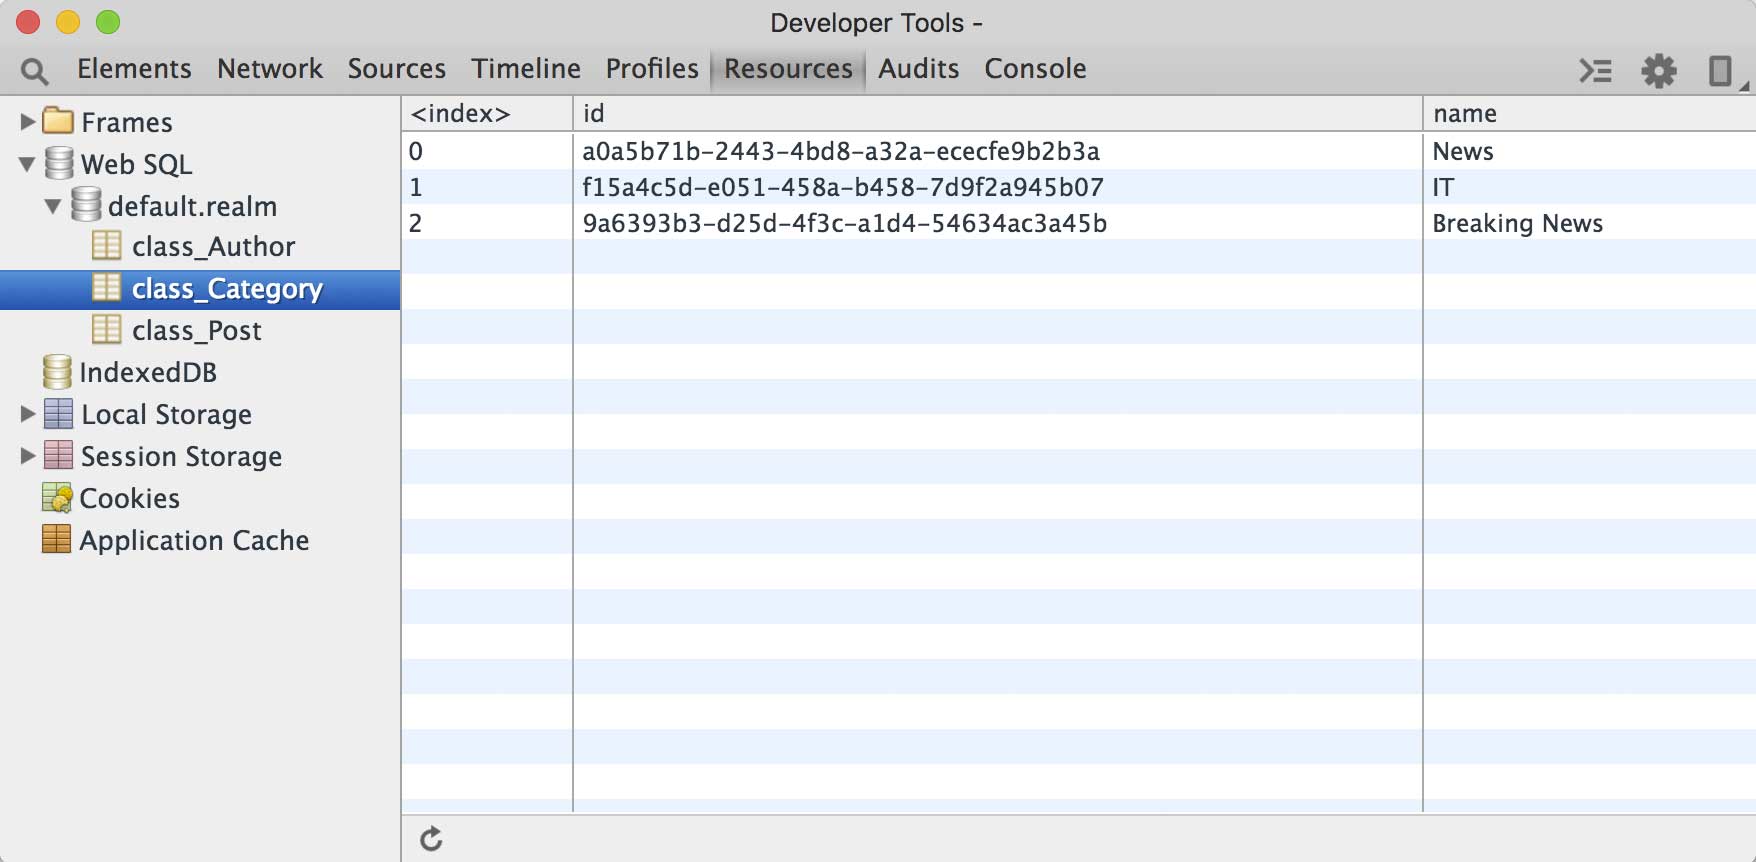
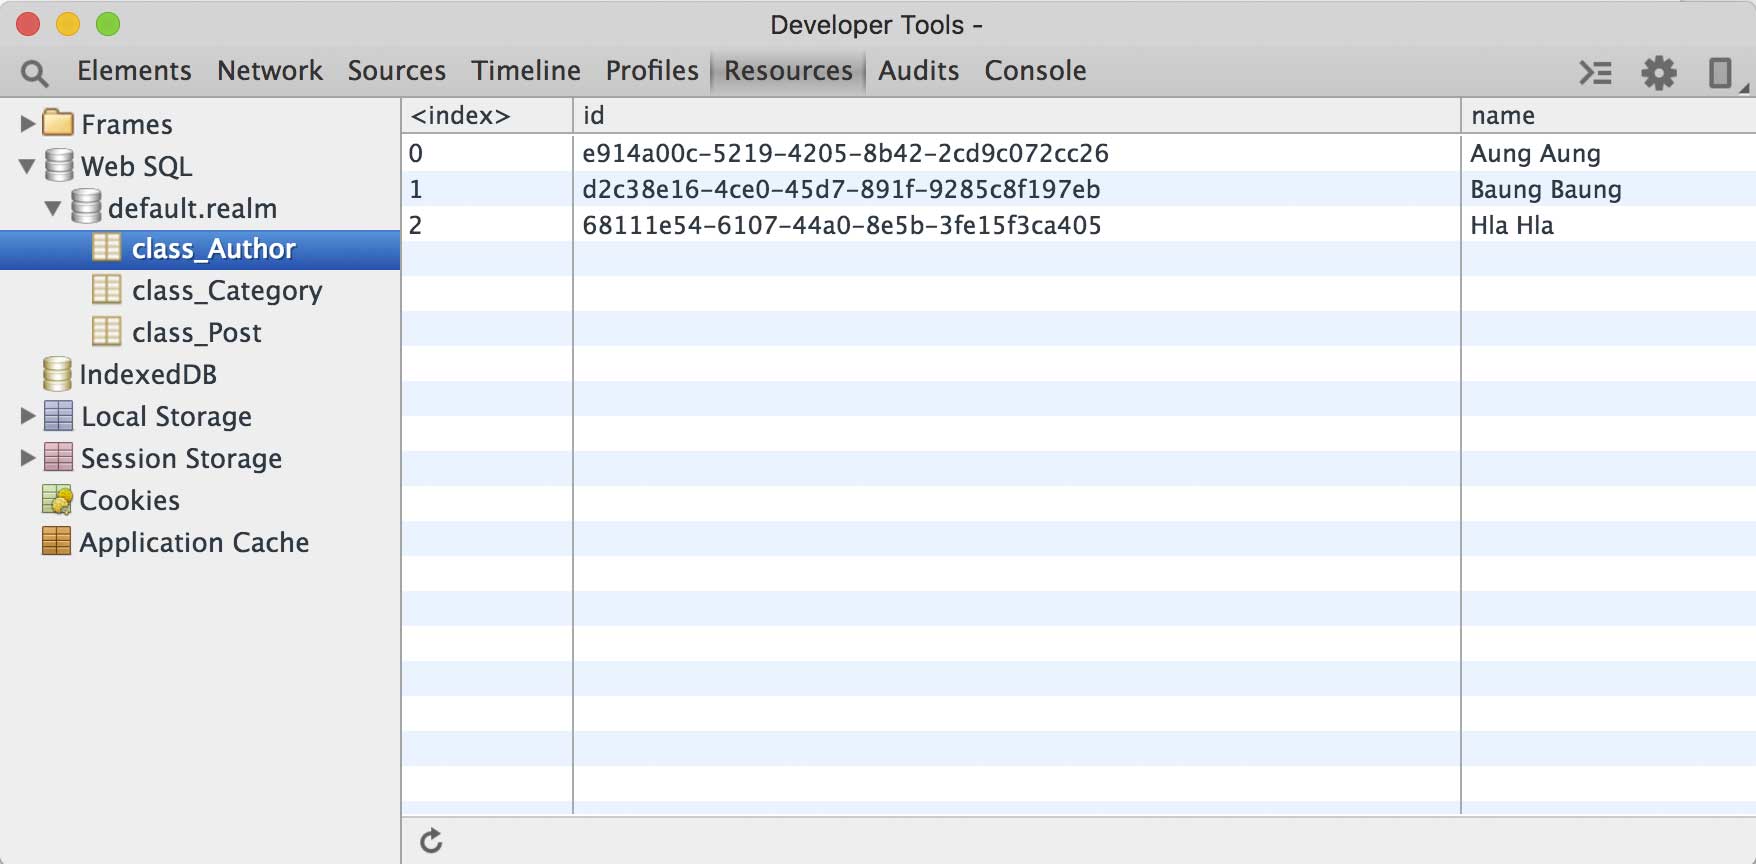
ကျွန်တော် အဲဒီလို ထည့်သွင်းပြီးတာနဲ့ chrome://inspect နဲ့ စမ်းကြည့်မယ်ဆိုရင် အောက်မှာ ပြထားတဲ့အတိုင်း အချက်အလက်တွေ ထည့်သွင်းလိုက်တာ တွေ့ရပါလိမ့်မယ်။
Category
Author
ကျွန်တော်တို့ ရှေ့ဆက်ပြီး Post တစ်ခု ထည့်ကြည့်ရအောင် Post မှာတော့ Author နဲ့ Category တွေ ပါလာပါပြီ။ Category - News၊ Author - Aung Aung ရဲ့ ပို့စ်တစ်ခု တင်မယ် ဆိုကြပါစို့။ ကျွန်တော် တစ်ခါတည်း ပေါင်းပြီး စမ်းလို့ ရမယ့် ပုံစံပြောင်းရေးလိုက်ပါတယ်။ (Error တက်လာရင် App တစ်ခုလုံး Uninstall လုပ်ပြီးမှ စမ်းပါ)
| package net.myanmarlinks.awesomerealm; | |
| import android.os.Bundle; | |
| import android.support.v7.app.AppCompatActivity; | |
| import android.util.Log; | |
| import net.myanmarlinks.awesomerealm.model.Author; | |
| import net.myanmarlinks.awesomerealm.model.Category; | |
| import net.myanmarlinks.awesomerealm.model.Post; | |
| import java.util.ArrayList; | |
| import java.util.List; | |
| import java.util.UUID; | |
| import io.realm.Realm; | |
| public class MainActivity extends AppCompatActivity { | |
| private Realm realm; | |
| @Override | |
| protected void onCreate(Bundle savedInstanceState) { | |
| super.onCreate(savedInstanceState); | |
| setContentView(R.layout.activity_main); | |
| realm = Realm.getDefaultInstance(); | |
| List<Category> categories = new ArrayList<>(); | |
| List<Author> authors = new ArrayList<>(); | |
| categories.add(new Category(getUniqueID(), "News")); | |
| categories.add(new Category(getUniqueID(), "IT")); | |
| categories.add(new Category(getUniqueID(), "Breaking News")); | |
| authors.add(new Author(getUniqueID(), "Aung Aung")); | |
| authors.add(new Author(getUniqueID(), "Baung Baung")); | |
| authors.add(new Author(getUniqueID(), "Hla Hla")); | |
| realm.beginTransaction(); | |
| realm.copyToRealm(categories); | |
| realm.copyToRealmOrUpdate(authors); | |
| realm.commitTransaction(); | |
| Category category = realm.where(Category.class).equalTo("id", categories.get(0).getId()).findFirst(); | |
| Author author = realm.where(Author.class).equalTo("id", authors.get(0).getId()).findFirst(); | |
| realm.beginTransaction(); | |
| Post post = realm.createObject(Post.class, getUniqueID()); | |
| post.setTitle("Hello World"); | |
| post.setCategory(category); | |
| post.setAuthor(author); | |
| realm.commitTransaction(); | |
| List<Post> posts = realm.where(Post.class).equalTo("author.id", author.getId()).findAll(); | |
| Log.d("POSTS", posts.get(0).getCategory().getName()); | |
| } | |
| private String getUniqueID() { | |
| return UUID.randomUUID().toString(); | |
| } | |
| } |
ကုဒ်ကို အသေးစိတ် လေ့လာကြည့်ရအောင်
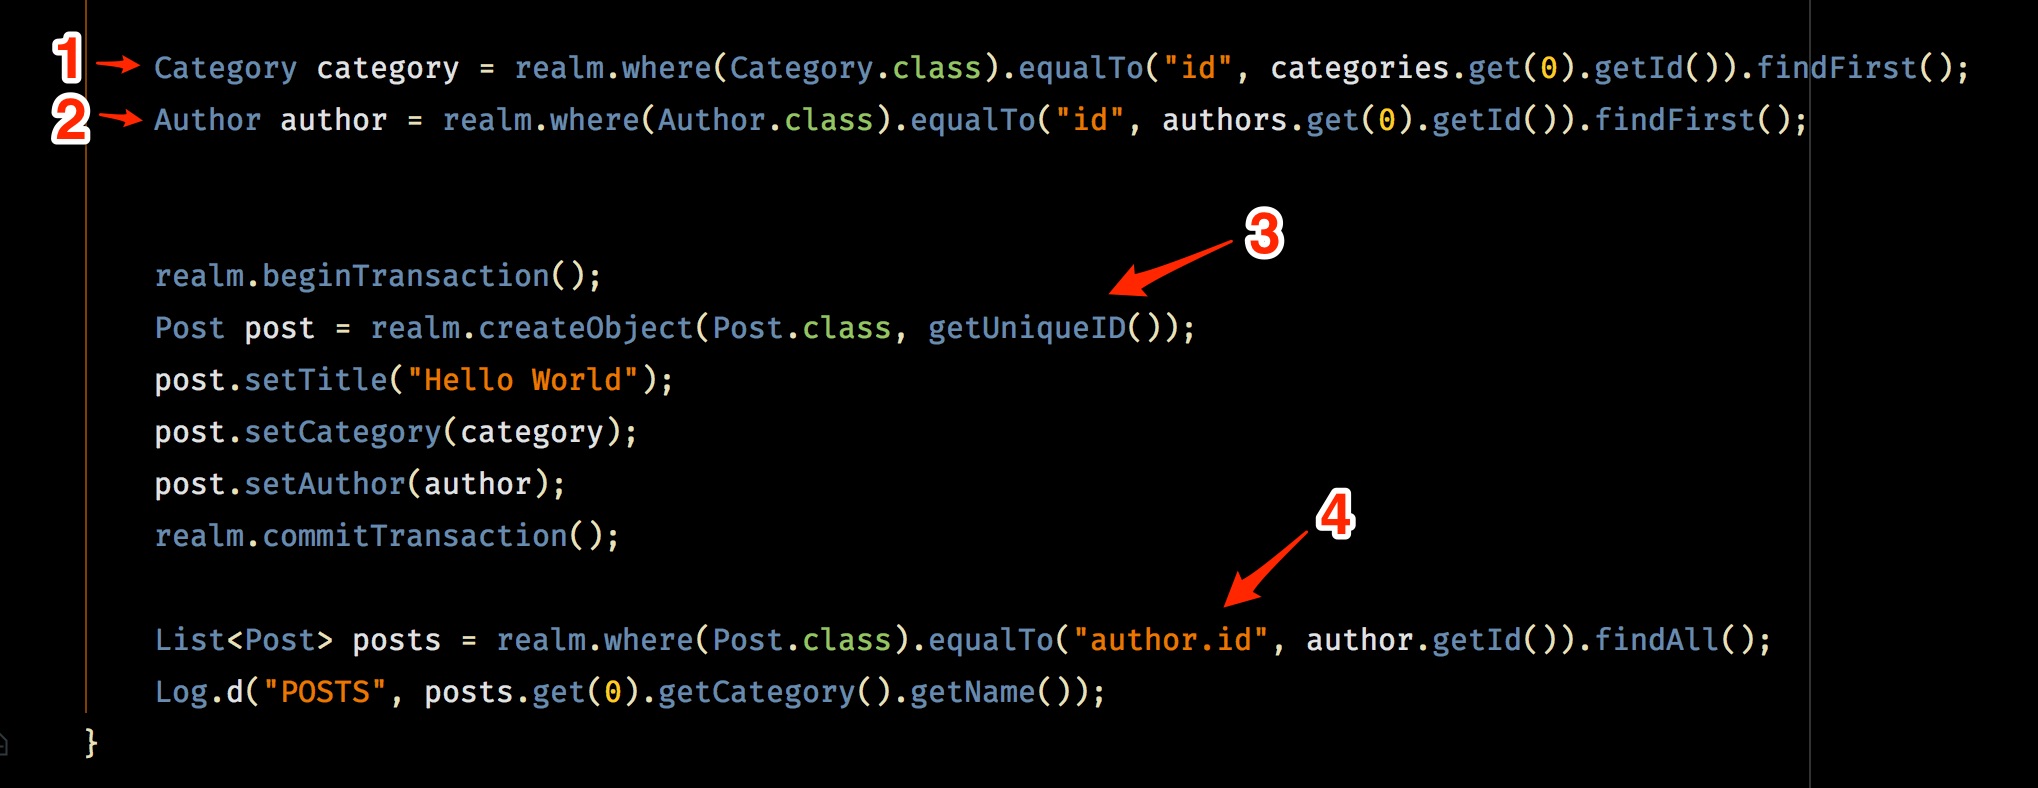
- Realm Category ထဲက ပထမဦးဆုံး Key Category ကို ဆွဲထုတ်လိုက်ပါတယ်။ (ဒီနေရာမှာ Realm Query ကို သုံးသွားပါတယ်)
- Realm Author ထဲက ပထမဦးဆုံး Key Author ကို ဆွဲထုတ်လိုက်ပါတယ်။
- ဒီတစ်ခါတော့ Data Create လုပ်နည်း ပုံစံအသစ်ကို သုံးသွားပါတယ်။ Primary Key သတ်မှတ်ထားတာ ဖြစ်တဲ့အတွက် realm.createObject(Post.class, <unique_id>) ထဲမှာ တစ်ခါတည်း Primary Key ကို ထည့်ပေးဖို့ လိုပါတယ်။
- ဒါကတော့ Author - Aung Aung ရေးထားတဲ့ ပို့စ်တွေကို ပြန်ထုတ်ပြထားတာပါ။ ထွက်လာတဲ့ Post ထဲက Category Name ကို Log ပြန်ရိုက်ပြထားတာပါ။ ရလာဒ်က - News ဆိုပြီး ပြပါလိမ့်မယ်။
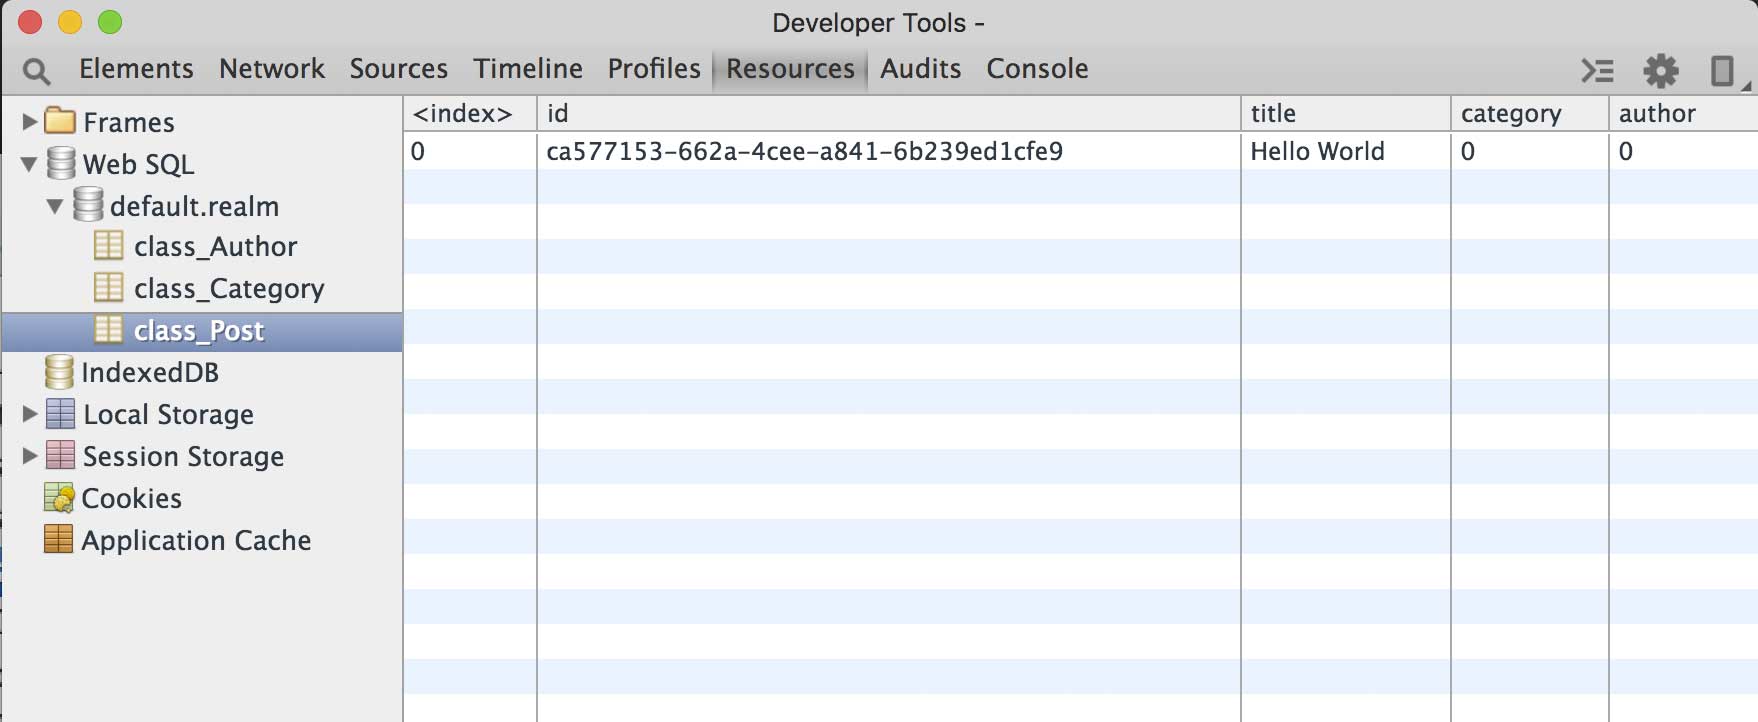
ဒီနေရာမှာ တစ်ခု သတိထားဖို့ လိုတာက Chrome Stetho က Category နဲ့ Author Relation တွေကို ပြသပေးနိုင်မှာ မဟုတ်တော့ပါဘူး။ အောက်ကပုံမှာ ပြထားတဲ့အတိုင်း category နဲ့ author နေရာမှာ 0 တွေပဲ ပြနေပါလိမ့်မယ်။
နိဂုံး
ဒီအပိုင်းမှာတော့ ဒီလောက်ပါပဲ။ ရှေ့ဆက်ပြီး အပိုင်း (၃) မှာ Realm Query အကြောင်း လေ့လာကြပါမယ်။


Join Us On